

Table of Contents
- Why Furniture Photography Matters for Online Sales
- How to Stage Furniture to Sell
- Furniture Photography Lighting Essentials
- Best Angles for Furniture Photography
- Creating Your Furniture Listing Photo Checklist
- Editing and Preparing Photos for Online Listings
- Platform-Specific Photo Requirements
- Common Mistakes to Avoid
- Frequently Asked Questions
Last Updated: October 6, 2026
Why Furniture Photography Matters for Online Sales
When you’re selling furniture online, knowing how to photograph furniture for online sales means your photos are everything. A buyer can’t touch the fabric or sit on the chair. They can’t check the finish up close or measure the legs against their doorframe. They only have your pictures to decide whether to buy.
Bad photos kill sales. Good photos create them. The difference isn’t expensive equipment or professional studios. It’s knowing what buyers actually need to see.
Over our 16 years serving the community, we’ve learned what works and what doesn’t. The pieces that sell fastest are the ones with clear, honest photos that show condition, scale, and style all at once.
Your first photo is your only chance to stop a buyer from scrolling past. Make it count by showing the whole piece in good light with the room context visible. Buyers want to imagine it in their own space.
How to Stage Furniture to Sell
Staging means arranging your furniture to show it off. Don’t just plop a chair in the middle of an empty room. Put it where a buyer can see how it fits into a real home.
Set up your furniture in a room with other pieces. A sofa looks better next to a side table and a lamp. A dining chair belongs at a table. Show the buyer what they’re actually getting and how it works with other items.
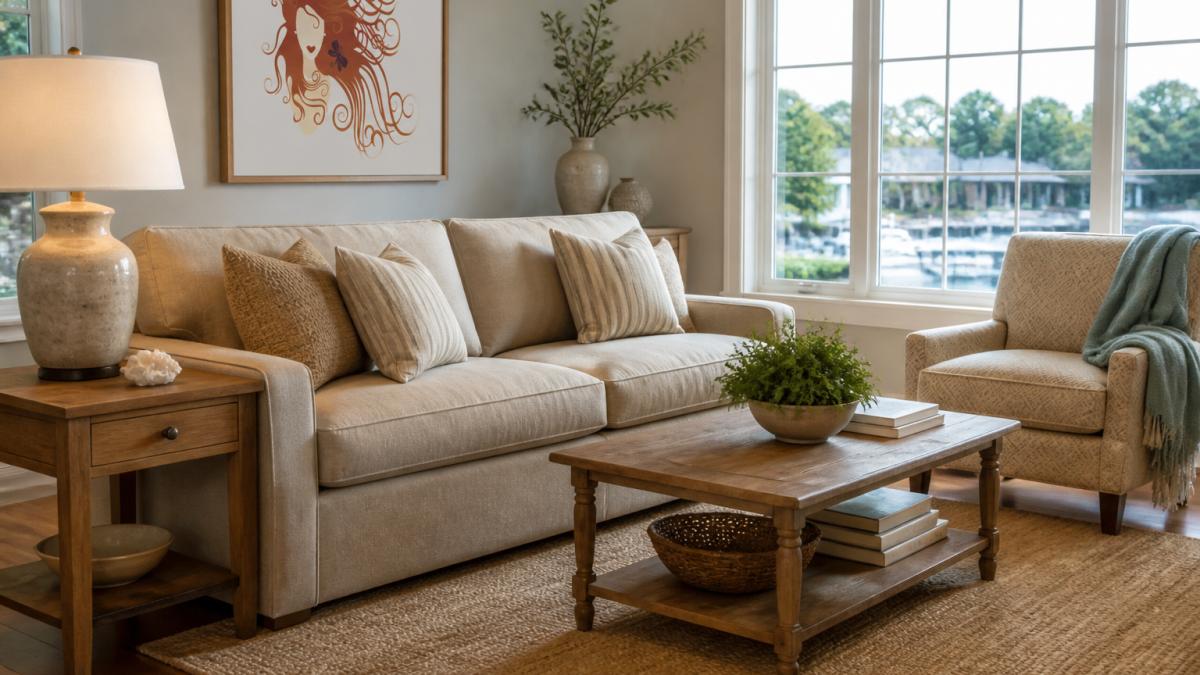
Clear the clutter around your furniture. Remove throw pillows that belong to you, family photos, and personal items. You want buyers focused on the furniture, not distracted by your life. A clean background makes the piece the star.
Use neutral colors as your backdrop. White walls, light gray walls, or natural wood floors work best. Busy wallpaper or bright colors compete with your furniture for attention.
Show the furniture from multiple angles in the staging area. Take photos from the front, side, back, and at least one detail shot. Buyers want to see how the piece looks from different views. This builds trust that you’re not hiding damage.
Don’t stage furniture in a cluttered or dirty room. Buyers assume the piece picks up that energy. A messy background makes even quality furniture look questionable.
Furniture Photography Lighting Essentials
Lighting makes or breaks furniture photos. Bad light hides details and distorts colors. Good light shows condition, finish, and true color.
Use natural light whenever possible. Position your furniture near a window with indirect sunlight. Direct sunlight creates harsh shadows and blown-out spots. Indirect light is soft and even. It shows texture without creating glare on wood or glass.
Shoot during the golden hours if you can. Early morning or late afternoon light is warmer and more flattering than midday sun. Midday light is harsh and creates dark shadows under furniture.
Add fill light to soften shadows. You don’t need expensive lighting equipment. A white bedsheet or poster board reflects light into shadow areas. Position it opposite your main light source. This fills in dark spots and shows details you’d otherwise lose.
Avoid mixing light sources. If you’re using natural light, don’t add a table lamp or overhead light in the same shot. Mixed light sources create color casts that make furniture look wrong. Stick to one main light source per photo.
Check your camera settings for lighting conditions. If your phone camera has a manual mode, lower the exposure slightly if the image looks too bright. Raise it if the image is too dark. Most phone cameras auto-adjust, but sometimes they get it wrong. Take a test shot and adjust if needed.
Natural light from a window is your best friend for furniture photography. It’s free, it’s flattering, and it shows true colors. Position furniture near a window and shoot with the light coming from the side.
Best Angles for Furniture Photography
The angle you shoot from changes how buyers perceive the furniture. A sofa shot from above looks smaller. A sofa shot from sitting height looks more inviting. Choose angles that flatter the piece and show its best features.
Shoot from eye level or slightly above. This is the height a person would actually view the furniture in their home. It feels natural and shows proportions accurately.
Show the front and sides of the furniture. Start with a straight-on shot of the front. Then take a 45-degree angle shot that shows the front and side together. This gives buyers a sense of depth and shape.
Include the room context in at least one photo. Show the furniture in the corner of the room or against the wall where it would actually sit. This helps buyers judge scale and imagine it in their own space.
Get close-up shots of details and condition. Photograph the fabric weave, wood grain, hardware, and any imperfections. Buyers want to see what they’re getting. Close-ups build confidence that you’re being honest about condition.
Photograph the back of the piece if it’s visible from behind. Some furniture looks different from the back. Show it. If there’s damage on the back, photograph that too. Honesty about condition increases buyer trust and reduces returns or complaints.
Creating Your Furniture Listing Photo Checklist
Before you upload photos to sell furniture online, run through this checklist. It ensures you’ve captured everything a buyer needs to make a decision.
| Photo Type | Purpose | What to Show |
|---|---|---|
| Full front view | Shows overall style and condition | Entire piece, straight-on angle, good light |
| Side angle view | Demonstrates depth and shape | Front and side together, 45-degree angle |
| Room context | Helps visualize scale and placement | Furniture in room corner or against wall |
| Detail shots | Reveals fabric, finish, and condition | Close-ups of weave, wood, hardware, stitching |
| Back view | Shows rear condition | Back of piece if visible from behind |
| Damage or wear | Builds trust through honesty | Any scratches, stains, or imperfections, well-lit |
Organize your photos in a logical order. Start with the best full-view photo. Follow with side angles and room context. End with detail shots and any damage. This tells a story: here’s the piece, here’s how it looks from different angles, here’s what you’re actually getting.
Take at least 8-12 photos of each furniture piece. More photos mean more angles and details for buyers to review. They reduce returns and complaints because buyers know exactly what they’re purchasing.
Check your photos on a phone screen. Upload them to your listing and view them the way most buyers will see them. Small screens show less detail. If a photo looks unclear on a phone, retake it or adjust the angle.
Editing and Preparing Photos for Online Listings
You don’t need Photoshop to edit furniture photos. Simple adjustments make a huge difference.
Adjust brightness and contrast. If your photo is too dark, brighten it slightly. If it’s washed out, increase contrast to bring back detail. Most phone photo apps have simple brightness and contrast sliders. Use them.
Fix color accuracy. If the wood looks too yellow or the fabric looks too blue, adjust the color temperature. Your phone’s editing app likely has a “warmth” or “temperature” slider. Aim for colors that match what you see in person. Buyers will notice if the color in the photo doesn’t match the actual piece.
Crop out unnecessary background. If your photo includes half a wall or a corner of the ceiling that doesn’t add context, crop it out. Keep the focus on the furniture. Tighter crops often look more professional.
Resize photos for your platform. Different listing sites have different photo requirements. Check the platform’s guidelines and resize accordingly. Photos that are too large may not upload properly. Photos that are too small lose detail.
Don’t over-edit. Avoid filters that change the look dramatically. Avoid heavy blur or artificial effects. Buyers want to see the actual furniture, not an Instagram version of it. Keep edits subtle and focused on accuracy.
Never use filters that change the true color of the furniture. A filter that makes wood look warmer or fabric look more saturated is lying to the buyer. Honest photos build trust and reduce returns.
Platform-Specific Photo Requirements
Different platforms want different things. Facebook Marketplace, Craigslist, eBay, and consignment sites all have their own guidelines.
Facebook Marketplace: Accepts up to 10 photos per listing. The first photo is the most important, it’s what shows in search results. Use your best, clearest full-view photo. Include multiple angles and close-ups of condition.
Craigslist: Allows up to 24 photos. More photos increase buyer interest. Use them. Include full views, angles, details, and any damage. Craigslist buyers are detail-oriented.
eBay: Supports up to 12 photos for most sellers. The first photo is featured in search results. Make it count. Include a full view, side angles, close-ups of condition, and detail shots.
Consignment sites like Le Rouge Tete: Check with your local consignment store about their photo requirements. Many consignment shops take photos in-house to ensure consistency and accuracy. When you consign furniture, the store handles photography.
Instagram and Pinterest: If you’re marketing furniture on social media, use your best full-view photo with the room context visible. These platforms favor lifestyle shots that show furniture in actual rooms. Include a close-up detail shot in the carousel.
Check file size limits. Some platforms compress large files. If your photos are getting blurry after upload, try smaller file sizes. Most platforms work best with photos under 5 MB.
Common Mistakes to Avoid
Learning what not to do saves time and increases sales.
Don’t photograph furniture in poor light. Shadows hide details. Harsh light creates glare. Bad light makes good furniture look questionable.
Don’t use only one photo. Buyers want multiple angles. They want to see condition from different views. One photo isn’t enough to build confidence.
Don’t hide damage. Photograph scratches, stains, and wear honestly. Buyers will discover them anyway. Honesty builds trust. Hidden damage destroys it and leads to returns or negative feedback.
Don’t photograph furniture in a cluttered room. A messy background distracts from the piece and makes it look less valuable. Clear the space. Use a neutral backdrop.
Don’t shoot from awkward angles. Shooting from the floor or from high above distorts proportions. Shoot from eye level or slightly above.
Don’t use filters or effects that change color. Buyers need to see the true color. Filters that warm up wood or saturate fabric mislead buyers.
Don’t forget to show scale. Include photos with room context. Show the furniture next to a window, door, or other recognizable object. This helps buyers judge size.
Don’t wait for perfect conditions. Good enough is better than never. If you can get decent natural light and a clean background, take the photos.
Photographing furniture for online sales doesn’t require expensive equipment or professional training. It requires honesty, good light, and multiple angles.
If you’re selling or consigning furniture, Le Rouge Tete makes the process seamless. With our 50/50 consignment split and no end dates on consignments, you keep more of what your furniture sells for.
Frequently Asked Questions
How many photos should I include in a furniture listing?
Include at least 5-8 photos per item to give buyers a complete view. Capture the furniture from multiple angles, close-ups of condition or details, and full-room context. More photos reduce buyer hesitation and questions about condition. For items with flaws, add dedicated shots showing any damage, wear, or imperfections clearly. This transparency builds trust and reduces returns or disputes.
What’s the best way to show furniture condition and flaws in photos?
Use close-up shots with good lighting to reveal scratches, stains, or wear honestly. Photograph flaws from the same angle and distance as your beauty shots so buyers see them in context. Describe any issues in your listing text alongside the photos. Honesty about condition prevents buyer disappointment and builds credibility. Items with transparent condition photos actually sell faster because buyers know what to expect.
What camera or phone settings work best for furniture photography?
Modern smartphones capture excellent furniture photos. Use a tripod or stable surface to avoid blur. Shoot in good natural light during midday or early afternoon. Enable your phone’s grid lines to keep furniture level and centered. Use portrait mode sparingly, it can blur important details.
How do I measure photography performance for my furniture listings?
Track which photos get the most views and which listings convert fastest. Note which angles, lighting styles, and staging approaches result in faster sales. If a listing sits unsold, try adding more photos or reshoot with better lighting. Compare your successful listings to identify patterns, certain backgrounds, angles, or photo counts may perform better. Use this feedback to refine your approach for future furniture photography.