

Table of Contents
- When Restoring Vintage Furniture Boosts Resale Value (and When It Backfires)
- Antique vs. Vintage: Why the Label Changes Your Entire Restoration Strategy
- Best Finishes for Vintage Furniture Restoration: What Buyers Actually Pay For
- Is Painting Antique Furniture a Bad Idea? The Honest Answer
- Common Mistakes in Furniture Refinishing That Destroy Resale Value
- The ROI Framework: Calculating Whether a Restoration Project Is Worth It
- Frequently Asked Questions
Last Updated: September 11, 2026
When Restoring Vintage Furniture Boosts Resale Value (and When It Backfires)
Restoring vintage furniture to increase resale value works when a piece has strong bones, desirable provenance, and a finish buyers want. It backfires when you strip original patina or “improve” a rare piece into something the market no longer recognizes. At Le Rouge Tete, we’ve observed various outcomes across our consignment floor, and it comes down to one question: does this restoration add value, or erase it?
A piece with a wobbly leg and water rings is a project. The same piece with original finish and documented history is an investment. The restoration itself is rarely the problem, applying the wrong treatment to the wrong piece is.
Below, we break down exactly how to tell the difference before you pick up a sander.
Assessing Condition, Rarity, and Structural Integrity Before You Touch Anything
Structural integrity comes first, because no finish saves a piece with a cracked frame or failed joinery. Check these before spending a dollar on supplies:
- Joints and frame: Rock the piece gently. Any wobble means loose mortise-and-tenon joints or failing glue blocks.
- Wood grain and veneer damage: Lift edges with a fingernail. If veneer is lifting, it needs re-adhering before any surface treatment.
- Structural integrity: Inspect legs, stretchers, and drawer runners for splits or repairs from prior owners.
- Historical significance: Look for maker’s marks, labels, or stamps on the underside or back.
Many buyers walk away purely because a prior repair was done badly, like sanding over a veneer patch instead of matching the grain, leaving a visible scar that kills marketability.
Photograph every label and stamp before you clean anything. Provenance documentation starts the moment you acquire the piece, and buyers pay more when you can show where it came from.
Antique vs. Vintage: Why the Label Changes Your Entire Restoration Strategy
An antique is at least 100 years old; vintage describes pieces roughly 20 to 99 years old (britannica.com). That distinction dictates how aggressively you can restore without damaging collectability. But age alone isn’t enough, the market segment matters just as much, and most guides skip this.
Two Markets, Two Opposite Rules
The resale market splits into two broad buyer pools, and they want opposite things:
- Preservation buyers, collectors of 18th- and 19th-century antiques, period furniture, and documented historical pieces. They pay a premium for original finish, original hardware, and untouched patina. Refinishing is value destruction.
- Design buyers, collectors of mid-century modern, Danish modern, and later vintage work. They pay a premium for clean, usable, period-correct condition. A dull, scratched finish is a value drag, and a proper refinish in the right material is a value add.
A 1950s walnut sideboard and an 1820s mahogany chest can be the same size, wood family, and acquisition price, yet require opposite restoration strategies. Applying the antique rule to the mid-century piece leaves money on the table; applying the mid-century rule to the antique destroys it.
How the Label Drives Finish, Hardware, and Repair Decisions
| Factor | Antique (100+ years) | Vintage (20-99 years) |
|---|---|---|
| Finish approach | Conserve original patina; clean and wax only | Refinish if damaged, matching period material |
| Buyer priority | Provenance and period accuracy | Usability and style |
| Hardware | Preserve original at all costs | Replace only if missing or broken; match era |
| Painting risk | High value loss on rare woods or documented pieces | Moderate, style-dependent; painted mid-century can sell well |
| Repair philosophy | Reversible, minimally invasive | Durable, functional, visually clean |
| Documentation | Condition report and provenance chain | Photos of restoration process and materials used |
The Mid-Century Exception Worth Knowing
Mid-century modern is where refinishing most reliably increases resale value. These buyers are design-driven, not provenance-driven, and expect a piece to look and function like new. A proper oil-and-wax finish on walnut or teak is what the market pays for.
That said, “refinish” does not mean “strip and polyurethane.” The finish still has to match the era. A high-gloss film finish on a 1960s piece reads as wrong to the buyers who pay the most for it. The rule is: intervene as much as the market wants, but never more than the period allows.
The Antique Exception Worth Knowing
On the antique side, the most common value-destroying mistake is refinishing a piece that only needed cleaning. A century of patina isn’t dirt, it’s the surface evidence of age collectors pay for. Stripping it to make the wood “look better” removes the exact quality the buyer wanted.
When an antique genuinely needs intervention, a failed finish, active flaking, structural repair, the goal is reversibility. Shellac and traditional waxes can be removed later without harming the wood (nps.gov). Modern catalyzed finishes and polyurethane cannot, and conservators and serious buyers know the difference.
Why This Changes Your Pricing Strategy
Once you know a piece’s market, your pricing anchor changes. Antiques anchor to documented sales and condition reports; vintage anchors to design-market comparables and restoration quality. Two pieces with identical acquisition costs can have completely different profit ceilings, and the restoration strategy must match the pool, not the wood.
Before you strip or refinish anything, identify the market segment first. A piece that looks like a refinishing candidate to a design buyer can be a preservation candidate to a collector, and the wrong call can cut its value substantially.
Best Finishes for Vintage Furniture Restoration: What Buyers Actually Pay For
The best finishes for vintage furniture restoration match the piece’s era and let the wood grain show through. Our buyers gravitate toward hand-rubbed oil and wax on mid-century pieces, and period-appropriate shellac or lacquer on antiques.
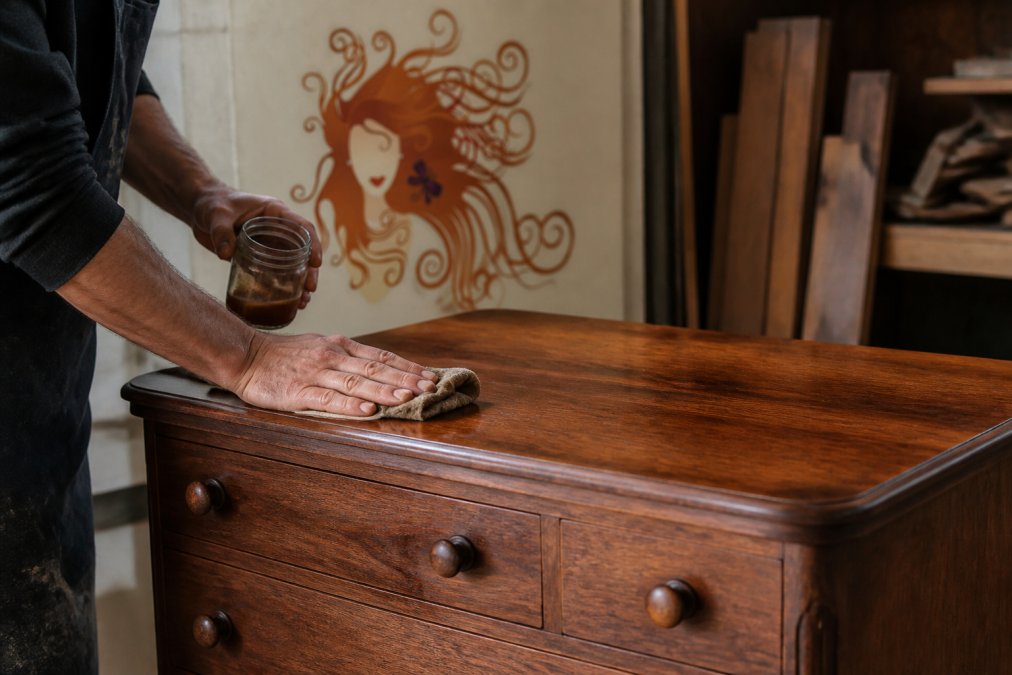
A high-gloss polyurethane topcoat on a 1950s walnut sideboard reads as wrong to anyone who knows the period. Surface treatment should support the piece, not shout over it.
Oil, Wax, Lacquer, or Polyurethane: Matching the Finish to the Piece
Each finish serves a different buyer expectation:
- Oil and wax: Best for mid-century and rustic pieces. Easy to repair, low sheen, highlights wood grain. Requires periodic reapplication.
- Lacquer: Period-accurate for many antiques. Dries fast, builds a smooth film, but is harder to touch up.
- Shellac: Traditional for pre-1900 pieces (si.edu). Reversible with alcohol, which conservators prefer.
- Polyurethane: Durable and water-resistant, but reads as modern. Best reserved for high-use pieces where durability outweighs period accuracy.
Most guides wrongly treat polyurethane as the default “best” finish because it’s toughest, but toughness is rarely what a resale buyer pays for.
Is Painting Antique Furniture a Bad Idea? The Honest Answer
Painting antique furniture is usually a bad idea when the piece has original finish, rare wood, or documented provenance. It’s reasonable when the wood is damaged beyond saving, the piece is common and mass-produced, or the paint itself is period-appropriate.
The honest answer depends on what you’re selling. A painted 1920s oak dresser with chipped veneer and no maker’s mark can sell faster and for more than the same piece stripped and refinished poorly. A painted Chippendale-style chest with original mahogany? That’s value walking out the door.
Painting is not the enemy. Painting the wrong piece is.
Painting over original finish without documenting it first can permanently reduce resale value. Once the paint goes on, you cannot prove what was underneath, and serious buyers will assume the worst.
Common Mistakes in Furniture Refinishing That Destroy Resale Value
The most damaging mistake in furniture refinishing is over-restoring: sanding past the patina, replacing original hardware, or refinishing a piece that only needed cleaning. Each erases the details that signal authenticity.
Other frequent errors we see on consignment intake:
- Using chemical strippers that raise the grain and leave residue in veneer
- Replacing period hardware with modern pulls
- Refinishing only part of a piece, creating visible color shifts
- Skipping varnish removal on the underside, which buyers check
- Sanding veneer with a power tool and burning through the top layer
Aesthetic appeal matters, but so does restraint. The pieces that tend to sell well are the ones where the restoration is invisible.
The ROI Framework: Calculating Whether a Restoration Project Is Worth It
Most restoration advice is anecdotal, someone refinished a dresser, sold it for more than they paid, and declared victory. That tells you nothing about whether your project will pay off. You need a repeatable framework that forces the numbers to talk before you pick up a sander.
A restoration project is worth it when your total investment, acquisition cost, materials, and the dollar value of your hours, stays comfortably below the realistic resale price. The word doing the heavy lifting there is realistic. Asking prices on marketplace listings are fiction. Sold comparables are facts.
Step 1: Establish the As-Is Floor and the Restored Ceiling
Before you buy or begin, find two numbers:
- As-is value: What the piece sells for right now, in its current condition, in your region. Search sold listings on eBay, check local auction results, and ask a consignment shop what they would list it for untouched.
- Restored ceiling: What a well-restored example of the same piece, era, and maker actually sells for. Not the highest asking price, the highest sold price you can verify.
The gap between those numbers is your entire working budget. If the gap is $150, you can’t spend $300 on materials and profit. This single check eliminates most bad projects before they start.
Step 2: Build a True Cost Stack
Most DIY restorers undercount by forgetting half the line items. A realistic cost stack includes:
- Acquisition cost, what you paid, or the opportunity cost of not selling as-is
- Consumables, stripper, sandpaper, finish, brushes, rags, gloves, respirator cartridges
- Hardware and repair materials, replacement pulls, glue, veneer patches, wood filler, clamps you may not own
- Tool amortization, if you buy a random orbital sander for this project, its cost belongs here, not in a separate hobby budget
- Your time, assign an hourly rate even if it is modest. A 12-hour project at $20/hour is $240 of value you are choosing not to spend elsewhere
- Contingency, add 15-20% for the hidden damage you will find once you start stripping
A common pattern is that a project that looks profitable at a certain material cost can become a break-even exercise after many hours of labor. The cost stack exposes that.
Step 3: Run the Profitability Checklist
Before committing, answer each of these honestly. A single “no” is not disqualifying, but two or more should make you walk away or sell as-is.
| Check | Pass condition |
|---|---|
| Restored ceiling minus as-is floor | At least 2.5× your projected material cost |
| Structural integrity | No cracked frame, failed joinery, or major veneer loss |
| Finish reversibility | You can restore without destroying original patina on a piece that needs it |
| Market demand | Comparable pieces are selling, not just listed |
| Time budget | You can complete it within your stated hours without rushing the finish |
| Documentation | You can photograph and record every step for resale proof |
Step 4: Compare Against the Consignment Alternative
DIY isn’t the only path. Sometimes the highest-return move is handing the piece to a consignment shop as-is and letting their buyer pool do the work. Run the numbers both ways:
- DIY net: Restored sale price − acquisition − materials − your time value
- Consignment net: As-is sale price − consignment commission (typically a percentage of the sale, often in the 30-50% range depending on the shop and the piece)
If the DIY net is only marginally higher, consignment wins on risk, you avoid a botched finish, cracked veneer, or a piece that sits for six months.
Step 5: Decide With Your Eyes Open
If the math is tight, the project isn’t worth it as a resale play. That doesn’t mean it isn’t worth doing, restoring for the love of the craft is legitimate, and the skills compound. But don’t confuse a hobby with a profitable flip. Restorers who consistently make money walk away from marginal projects and save their hours for pieces where the numbers work from the start.
Keep a simple spreadsheet of every project, acquisition, materials, hours, sale price. After several pieces, you will have your own real data on which eras, makers, and damage profiles actually pay, and you will stop guessing.
Frequently Asked Questions
Does refinishing vintage furniture decrease its value?
It depends on the piece. Refinishing can lower value on rare antiques with original patina, period-accurate hardware, or historical significance. For common vintage pieces with damaged veneer, water rings, or failing varnish, refinishing often increases resale value because buyers want furniture they can use immediately. Get a professional appraisal before touching anything rare or signed.
What types of furniture restoration add the most resale value?
Structural repairs, veneer stabilization, and surface treatment that preserves wood grain tend to add the most value. Fixing wobbly joints, replacing missing hardware with period-accurate pieces, and addressing water damage all raise buyer confidence. Cosmetic improvements like refinishing help, but buyers pay more for pieces that are solid and functional than for ones that simply look shiny.
Is it better to paint or stain vintage furniture for resale?
Staining usually preserves more resale value because it highlights wood grain and keeps the piece closer to its original finish. Painting can work for damaged pieces where the wood is beyond saving, or for specific market segments like farmhouse or coastal decor. But painting antique furniture often reduces collectability and turns off buyers looking for investment pieces.
How do I know if a piece of furniture is worth restoring?
Check three things: structural integrity, market demand, and your total investment. If the frame is solid, the wood grain is visible, and similar pieces sell well in your area, restoration likely pays off. If repairs require replacing major components or the piece has no provenance, you may spend more than it is worth. A professional appraisal helps clarify this before you start.
Restoring vintage furniture to increase resale value takes more judgment than skill, and the judgment is where most projects go wrong. If you’d rather skip the sanding and the guesswork, Le Rouge Tete can help. We offer a 50/50 consignment split with no end dates, a 24-hour hold policy so you can see how a piece fits your space, and convenient local pickup for large items. Get started with Le Rouge Tete and turn the furniture you’re not using into something that works for you.